
Key signatures are a fundamental musical concept that students need to understand to become competent and literate musicians. So why are key signatures so hard for kids to comprehend? When I ask my private students to identify the key signature, I usually get one of the following responses:
- Blank Deer-in-Headlights Stare
- Confusing Key Signature with Time Signature
- Reading the Sharps and Flats Out of Order
If you’ve ever attempted to teach key signatures, you’ll know it can be a long process. Many music students will try to memorize their key signatures, but it’s always more effective to teach them the process of reading key signatures. When our students understand the music theory surrounding tonality and key signatures, they become confident, capable musicians. Let’s explore some resources and teaching strategies that will help your students identify the right key every time.
Table of Contents
- 1 Concepts Students Need To Understand Before Learning Key Signatures
- 2 Start with Reading Sharps and Flats on the Music Staff
- 3 Teaching the Order of the Flats and Sharps
- 4 2 Easy Tricks for Reading Key Signatures
- 5 Using the Circle of Fourths and the Circle of Fifths
- 6 A Note About Enharmonics
- 7 Key Signatures & Tonality
- 8 Other Teaching Resources for Key Signatures and Tonality
- 9 Final Thoughts
Concepts Students Need To Understand Before Learning Key Signatures
Students should be well into their music reading journey when key signatures are introduced. I like to start key signatures during the early years of my students starting their school band or strings program. This usually occurs some time in grades 4-6 for most school districts. When introducing key signatures, it is critical that your music students understand the following concepts first:
- The Music Staff
- Clefs
- Line and Space Notes
- Reading Notation
- Intervals
- Whole Steps and Half Steps
Intervals, whole steps and half steps are paricularly important for students to understand since they’ll utilize these concepts to identify the key.
If your students are fuzzy or shaky on any of the concepts I listed, stop here and address those areas first! Don’t know where to start? I have some amazing resources in my TPT store that will help your students understand these concepts in no time!
Start with Reading Sharps and Flats on the Music Staff

Most music students don’t realize that sharps and flats can be placed on the music staff just like notes. It’s important to point out that accidentals (flats, sharps, and natural signs) can all be placed on the lines and spaces of the music staff just like musical notes can. From there, you can ask questions like “Is this accidental sign on a line, or inside a space?,” “Which line of the music staff is the flat sign on?,” or “Which note corresponds with the placement of this sharp?”
If you’re looking for a great practice worksheet for this, try this one from my TPT store!
Teaching the Order of the Flats and Sharps
Sharps and flats are read left to right in a key signature–just like reading a book! I like to use mnemonic devices to help my students remember the order of the sharps and flats:
Sharp Key Signatures
- Order: B-E-A-D-G-C-F
- Mnemonic Device: “Before Eating A Donut, Get Coffee First”
Flat Key Signatures
- Order: F-C-G-D-A-E-B
- Mnemonic Device: “Fat Cats Go Down Alleys Eating Birds”
2 Easy Tricks for Reading Key Signatures

Once students can remember the order of the flats and sharps, it’s time for them to learn how to identify the key signature. The simplest method is to teach your students these two rules:
Sharp Keys:
Find the last sharp in the key signature and raise it by a half step.
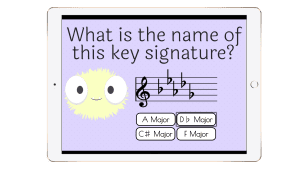
Example: In the key of D major the last notated sharp is C. When that note is raised by a half step, it reveals the key signature – D major!
Flat Keys:
Find the second-to-last flat in the key signature–that’s the key!
Example: In the key of A♭ major, the second to last flat is A. That’s the key!
This method will work well for most of your learners–especially your analytical thinkers! Another method, ideal for visual learners, is to examine the circle of fourths and the circle of fifths.
Using the Circle of Fourths and the Circle of Fifths

The Circle of Fourths and the Circle of Fifths are excellent visual aids that help students identify and remember key signatures. This is especially helpful for the visual learners in your classroom. The circle of fifths is designed to move clockwise in ascending fifths. Each step to the right introduces a new sharp in the order and shows students the corresponding major and relative minor keys. Likewise, the circle of fourths moves counterclockwise (to the left) and introduces a new flat in the order while also showing the major and relative minor keys.
Want a print-and-go visual aid containing the circle of fourths and the circle of fifths? Join the Chamber of Freebies! It’s my growing library of free music education resources. Inside, you’ll find a printable handout for the Circle of Fourths and Fifths that you can distribute to students or use as a visual in your classroom!
Creative Ways to Practice the Circle of Fourths and Fifths
- Color-Coding: Have students use colored pencils or crayons to color-code the Circle of Fourths and the Circle of Fifths from The Chamber of Freebies. Encourage students to choose different contrasting colors for the flats side and the sharps side, as well as another color for the relative minor circle.
- Play or Sing Through the Notes of the Circle: This is a nice warm-up that will help your students memorize the order of the circle of fourths and/or fifths. Start on C and play through each tone in the order of the circle. I like to do this on Orff xylophones, but you can also have students sing the pitches, which works well too. The best combination? Playing and singing the circle!
A Note About Enharmonics
Music students are usually surprised to learn that some scales can sound the same but have different names. These are called enharmonics, and it means that the same pitch can have two different names. It is easy for students to see enharmonic pitches when looking at the Circle of Fifths or Fourths or the white and black keys of the piano.
Examples:
- C♯ major and D♭ major have the same pitches but are notated differently.
- F♯ major and G♭ major are enharmonic equivalents.
- The scales for A♭ and G# major are written differently but sound the same.
In the Circle of Fifths and Fourths, you’ll notice that enharmonic keys appear at the farthest points on the circle. This is a great opportunity to explain why some composers might choose one over the other—certain keys are easier to read depending on the instrument or ensemble!
Key Signatures & Tonality

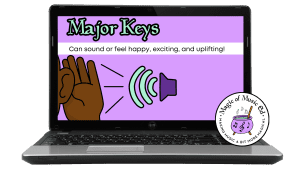
Your music students may be wondering why they have to observe these different key signatures. The answer is that the key signature determines the tonality of a piece. Once students can correctly identify the key, it’s important to follow up by connecting that key to scales, arpeggios, chords, and tonality (major v.s. minor). Here’s how to introduce major and minor keys to students:
- Play a C major and C minor scale back to back. Ask students how the scales sound and feel.
- Explain that major and minor keys are tools that composers use to make music sound and feel different.
- *Optional: Try showing students any video from Chase Holfelder’s Major and Minor playlist. He covers a lot of popular songs in minor keys that students will connect with right away.
- Use the Major or Minor lesson slides available for purchase from my TPT store.
- Have students practice playing major and minor keys on Orff Xylophones by creating major and minor improvisation stations, or by teaching students the C major and A minor scales.
Don’t forget to explain relative minor keys to your students! To find a relative minor key, go down three half steps from the major key.
Examples:
- C major’s relative minor is A minor (no sharps or flats).
- G major’s relative minor is E minor (one sharp: F#).
Other Teaching Resources for Key Signatures and Tonality
Looking for more resources? Check out the following teaching resources for key signatures and tonality!
Google Slides Lessons
Use these Google Slides lessons as your main teaching resource 👩🏻🏫
- Major or Minor? Google Slides Lesson (Purchase on TPT)
- Reading Major Key Signatures Google Slides Lesson (Purchase on TPT)
Boom Learning Resources
Use these digital task card games to practice and reinforce key signatures and tonality! 🎶
- Major Key Signatures in Treble Clef Boom Cards (Purchase on TPT or Boom Learning)
- Major Key Signatures in Bass Clef Boom Cards (Purchase on TPT or Boom Learning)
New to Boom Learning? Check out my blog post on using Boom Cards for Music Class!
Worksheets & Teaching Bundles
Printables and resource bundles that give you everything you need! ⬇️
- Reading Sharps and Flats Worksheet (Download Free on TPT)
- Printable Circle of Fourths and Fifths (Available in the Chamber of Freebies–join for free now!)
Final Thoughts
When your students understand key signatures and tonality, they achieve a major milestone in music literacy. Remember to vary your lesson with music theory, listening, instrument playing, and singing to keep the lesson engaging and applicable to different learning styles.
Do you have a favorite trick or strategy for teaching key signatures? Leave a comment and let me know what works in your classroom! Don’t forget to join the Chamber of Freebies to grab the free printable Circle of Fifths and Circle of Fourths, along with other engaging music ed resources you can start using this week!