As a music teacher, you’ve probably noticed that some of your students have issues with rhythm and timing. Despite the effort you put into teaching comprehensive lessons, you may still see students who:
- Cannot clap or count rhythms independently
- Struggle to subdivide correctly
- Perform rhythms unevenly
- Freeze when they see a dotted quarter note
- Shut down when they’re presented with a syncopated rhythm
- Show the dreaded look of absolute and utter confusion
If these struggles sound familiar, you’re not alone. Many students have trouble making that connection, leaving many music teachers wondering… why don’t they get it?
Table of Contents
- 1 From Struggling Student to Confident Music Teacher
- 2 A Music Teacher’s Approach to Steady Beat Development
- 3 Helping Students Understand Beat vs. Rhythm
- 4 Rhythm Counting Methods for Music Class
- 5 Music Teacher’s Guide to Teaching Time Signatures
- 6 Music Teacher Tips for Subdivision
- 7 Grade-Specific Rhythm and Timing Activities for Music Class
- 8 Music Teacher’s Guide to Rhythm Assessment
From Struggling Student to Confident Music Teacher
I want to share my own story about rhythm struggles because it shaped how I teach music today.
You might recognize some of the challenges I listed above. I certainly relate to them, because I was once that struggling student. For many years, rhythm was my kryptonite. I was navigating a learning disability as a child. I was all too familiar with the feeling of every single one of my classmates being able to clap, count, and perform rhythms with confidence and accuracy. And then there was me. And boy did my struggle make me feel small.
When I was learning, I experienced the following as a music student:
- A music teacher told me to practice more.
- A music teacher told me to tap my foot and use a metronome.
- A music teacher told me to count.
- A music teacher told me to subdivide.
What’s more, a music teacher told me that I had no internal clock and no chance to succeed in music. Thank goodness I didn’t listen to that last piece of advice!
How One Music Teacher’s Approach Changed Everything
Everything changed when I met the music teacher who finally helped rhythm make sense to me.
Her name is Dr. Allison Brewster Franzetti; She’s the extraordinary music teacher who gave me my “click moment.”
Years ago, I was a first-year music education major learning a difficult piece on the flute. My fellow musicians gave me valid but frustrating feedback on my rhythm mistakes. While I was doing my best, the rhythms just didn’t make sense to me.
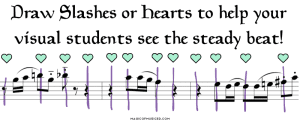
One day Dr. Franzetti took some extra time to look at the rhythms with me one-on-one. I will never forget it because she did something no music teacher had ever done for me in the past. She started drawing big slashes through my music. “This,” I remember her saying, “is the downbeat”. “This is where you’ll hear the metronome tick while you’re playing the rhythm.”
I froze. This was it! In all my years of learning music, no one had ever shown me the beat so clearly. As a visual learner, it was the information I needed to make rhythm and timing make sense.
Dr. Franzetti’s simple yet transformative teaching approach taught me that, as music teachers, we need to meet students where they are, not where we expect them to be. We have to remember that each student learns differently, and that rhythm and timing issues can stem from any number of cognitive, auditory, or visual processing challenges.
A Music Teacher’s Approach to Steady Beat Development
Now, let’s look at practical rhythm and timing strategies you can use in your music classroom. Everything starts with a steady beat—it’s the foundation that all of your students need to succeed. While clapping along to the beat of a song might seem simple, it’s a necessary skill for building rhythm and timing skills.
Watch for these key indicators of steady beat success:
- Student maintains a consistent steady beat without wavering in tempo or speed
- Foot tapping remains steady without shifting to match the rhythm
- Pulse is maintained while attempting complex rhythmic patterns
Make no mistake, students of all ages and grade levels can struggle with steady beat. We music teachers are constantly getting new students and transfer students who have different learning styles and levels of experience.
Steady Beat Songs to use in Music Class


Helping Students Understand Beat vs. Rhythm
Next, let’s tackle another common area of confusion: the difference between beat and rhythm. Many young musicians mix these two concepts up, but there’s a clear way to help them understand.
Students will often think of beat and rhythm as synonymous and interchangeable. If you ask a student to clap a steady beat but they respond by clapping a rhythm, you’ll want to correct their mistake. One of my favorite poems to use with second graders goes like this…
The Beat Stays the Same (Stanza 1)
The beat stays the same
The beat stays the same
But the rhythm changes with the words
(repeat)
Rain on the Housetop (Stanza 2)
Rain on the housetop
Rain on the tree
Rain on the green grass but
Not on me!
(repeat)
Try having your students gently tap the steady beat while chanting this poem. They can tap using their fingers or gentle instruments like rhythm sticks or castanets!
Rhythm Counting Methods for Music Class
Have you ever asked a student to count and clap a rhythm for you and they respond by clapping something incorrectly, without counting at all? This happens because counting is a skill you need to instill in your music students. For this reason, you should have your students practice hand writing the counts for rhythms before clapping or playing them.
Furthermore, the counting process should also be appropriate to your students’ grade level. Younger students can begin with a simple counting system like Ta and Ti-Ti. As they get older, they can transition to counting with numbers. This progression helps build confidence while developing proper counting skills.
Once students understand how to count rhythms, it’s time to introduce the framework that organizes those counts into measures.
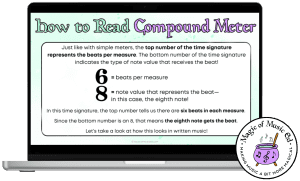
Music Teacher’s Guide to Teaching Time Signatures
Time signatures provide the essential framework for rhythm. They tell musicians how many beats are in each measure, and which note value gets the beat. I have three wonderful resources to help make time signatures make sense to your students:
Understanding Time Signatures and Meter – Two Music Lessons for Google Slides

This resource is honestly my first choice that will give you all the teaching tools to help kids “get it”. It’s a two lesson pack with each lesson including a lesson plan aligned with the National Core Arts Standards. It’s a simple, printable lesson plan that ensures you truly have everything you need to teach these two lessons seamlessly. Also included are:
- Two Google Slides Lessons
- Two Printable Rhythm Composition Activities (makes an excellent lesson follow-up!)
Each lesson takes around 30-40 minutes to teach and will cover the following standards:
- MU:Cr1.1 Generate and conceptualize artistic ideas and work
- MU:Cr2.1 Organize and develop artistic ideas and work
- MU:Pr4.2 Analyze, interpret, and select artistic work for presentation
- MU:Pr5.1 Develop and refine artistic work for presentation
- MU:Pr6.1 Convey meaning through the presentation of artistic work
Lesson 1: Introduces the concept of time signatures and teaches students to read and count in simple meters (2/4, 3/4 and 4/4)
- Includes embedded listening excerpts
- Rhythm counting and clapping activities.
- Have students practice rhythms on classroom instruments for extra fun!
- Use the rhythm composition as a bonus post-lesson activity or assessment!
Lesson 2: Reviews the concept of time signatures and teaches students how to read and count in compound meter.
- Includes embedded listening excerpts
- Rhythm clapping and counting activities through a fun candy-themed game!
- Teaches multiple counting systems to students
- Use the rhythm composition activity as a bonus post-lesson activity or assessment!
The best part about this lesson is that I’ve designed it really thoughtfully with many learning modalities and learning styles in mind. The audio excerpts are really helpful for your auditory learners while the “click and display” rhythm counts is really helpful for your visual learners. The counting and clapping activities will reach every learning style in the classroom ensuring every student is learning through visual, aural and tactile methods. It’s honestly the kind of lesson I wish someone had given me as a student. As you can see I’m really excited about it and I know it will help your students succeed too! Plus who doesn’t want two weeks of lessons done for them? Click the button below to purchase this lesson pack for your music classroom!

What Is A Time Signature? An Interactive Nearpod Lesson!

This comprehensive Nearpod lesson for Grades 3 and up uses interactive elements to teach students about measures, time signatures, and writing counts. You can facilitate this lesson live, or let students work through it independently at their own pace by assigning it through Google Classroom.
Travel Through Time Signatures Boom Cards
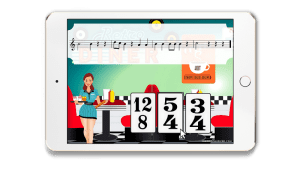
Looking for a fun gamified way to practice time signatures with your students? My Travel Through Time Signatures Boom Cards turn learning into an adventure! Students play the game by counting the beats in each rhythm excerpt, and selecting the correct time signature. As they play, they’ll progress through engaging time-travel themed scenery!
New to using Boom Cards in music class? Check out my blog post, Boom Cards in Music Class to learn more!
Music Teacher Tips for Subdivision
In the same way that a visual aid sparked my click moment with subdivision, your students will also benefit from different instructional approaches. Breaking down beats into smaller segments can feel like a huge challenge for many students. While one student may understand subdivision from your explanation, another might need a visual cue, and yet another might need to feel it before they understand it.
Having multiple teaching strategies ready means you can effectively teach subdivision to all the students in your classroom. With that in mind, here are some strategies for doing it:
Visual Learners

- Note value trees
- Writing counts
- Using slashes or hearts to represent the downbeat
Auditory Learners
- Echo rhythms
- Aurally identify rhythms
- Use syllables or popular music examples to represent rhythms requiring subdivision
Tactile Learners
- Subdividing rhythms on classroom instruments
- Structured composition assignments
- Using a finger-tapping system for subdivisions
Grade-Specific Rhythm and Timing Activities for Music Class
Steady Beat Google Slides Music Lesson for Grades K-1

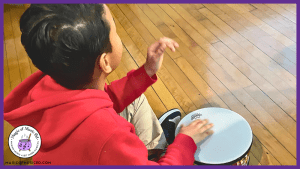
Duet with Heart Beat Activity for Grades K-1
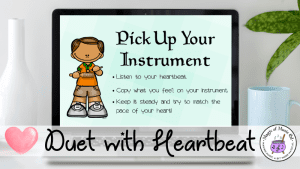
A quick, five-minute steady-beat activity where students create a duet with their heartbeat, using classroom or homemade instruments. This resource is exclusive to members of the Chamber of Freebies.
Steady Beat Grid Activity for Grades 2-4
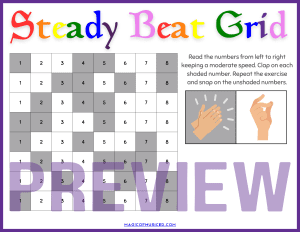
Steady Beat Grids are visual tools that help students connect steady beat with counting. Students maintain a steady beat while counting the numbers out loud, moving from left to right across the grid. To make it more engaging, try incorporating different body percussions for the shaded boxes or gradually increasing the tempo as students become more confident. Access all three printable steady beat grids by joining The Chamber of Freebies.
Pass The Beat Around the Room Game for Grades 4-6
This engaging group activity reinforces both steady beat and quarter rests. Students sit or stand in a circle and pass the beat around with each student taking a turn on a word or syllable within the chant “Pass the Beat Around The Room”. If a student misses the steady beat, they’re out of the game but still get to participate by becoming one of the quarter rests. Students continue to play until there is a winner. To increase the challenge of the game, try speeding up the tempo as more students are eliminated.
Music Teacher’s Guide to Rhythm Assessment
Looking for ways to check if your students are understanding rhythm and timing concepts? Students indicate growth differently, so I like to look at what they can do and what they know. Ultimately, there are two simple ways to assess a student’s progress: through performance skills, and content knowledge.
Performance Assessment Methods
- Counting and clapping rhythms
- Speaking or singing rhythms
- Aurally identifying a rhythm
- Structured improvisation activities
⭐ Pro Tip: Use a performance rubric and consider recording assessments to maintain consistency with grading!
Content Knowledge Assessment Methods
- Composing a rhythm
- Writing counts for a rhythm
- Creating a graphic organizer of note values and duration
These practical strategies can help many students overcome their rhythm and timing struggles. Your students can do it too. Rhythm and timing doesn’t have to be a mystery. Making small, meaningful tweaks can create big breakthroughs for your students.
Do you know another music teacher who could benefit from these rhythm and timing teaching strategies? Share this post with them!